Monday, December 30, 2013

BB Cream: What is it and why should I use it?


What are BB Creams?
Short for beauty balms or blemish balms. They were first developed in Germany by a dermatologist who wanted a single cream that would protect skin and provide coverage after laser treatments. These all-in-one products combine the functions of a primer, anti-aging serum, moisturizer, and light foundation—plus, many contain added benefits like SPF.

Though I prefer using individual moisturizer, primer and foundation: BB Cream is definitely my go-to on mornings when I'm in a rush. I use Younique's BB Flawless. (It's gluten-free and vegan, woot!) This all-in-one moisturizer, treatment, and foundation works great to smooth out the skin, correct my complexion, and of course offers protection from harmful UV rays all day long. It works great as a lightweight foundation on its own and reduces shine, giving me a natural-looking matte finish. 


Quick Tip: Filing Nails


Sunday, December 29, 2013

Gorgeous Makeup Tutorial


This is a gorgeous and (even better) very simple look to achieve! You want to, of course, start with a smooth canvas. Two tips I always give to get that youthful, flawless face: 1. Start with a makeup primer (Benefits of Makeup Primer) 2. This sounds ridiculous but a lot of women actually aren't applying blush correctly. Make sure you've got it down!

The Look:
  1. Sexy (dry)
  2. Infatuated
  3. Vulnerable
  4. Sexy (wet)
  5. Risque (dry)
  6. Risque (wet)
  7. 3D Fiber Lashes (WAY better than false lashes!)
  8. Luscious Lip Gloss
I LOVE Younique's product line because it's 100% natural, chemical-free, mineral-based pigment powders, free of talc, oils, preservatives, perfumes, synthetic dyes, and parabens. 


Cure Acne + Scars with Lemon Juice and Rosewater


  • Mix equal parts lemon juice and rose water. (I personally love Younique's Rose Water - it's vegan and super refreshing.)
  • Apply directly to skin. You might feel an initial sting from the lemon juice.
  • Rinse after 15-30 minutes.

Why It Works
Rose water is a natural astringent that doesn't dry out your skin since it contains no alcohol. It helps balance your skin's pH level & tightens pores. Lemon juice - also a natural astringent - removes blackheads, fades scars & age spots, brightens your skin tone and exfoliates dead skin. Think of lemon juice as a natural antibacterial cleanser that fights breakouts. 


Avocado Hair Mask for Dry/Damaged Hair


Egg, Avocado, & Olive Oil Hair Mask:

Avocado is rich in fatty acids, making it very moisturizing for your hair.

  • 2 egg yolks 
  • 2 teaspoons of extra virgin olive oil
  • half of a ripe avocado. 

Mash avocado and mix in egg yolks. Coat hair, cover with shower cap, and leave on for 20 minutes. Rinse with cool water and then proceed to shampoo and condition as usual.

Guest Room Beauty Samples


Maybe it's because I REALLY like free stuff or because I REALLY like shopping, but I somehow ended up with approximately 39482794872397 samples of perfumes, cleaners, shampoos and everything in between. I stumbled across this idea and I'm MADLY in love with it! Put all these samples into a glass jar for the guest bathroom! Cute & useful!

Quick Tip: Warm Curler for Fuller Looking Lashes


Simple Trick to Make Lashes Look Fuller


A great, lesser-known trick to make your eyelashes look fuller is to tightline them. This technique is practically invisible and it also really helps to define your eyes. Take a black powder (I use Risque by Younique -- a mineral-based pigment I'm madly in love with), and use an eyeliner brush to apply the eyeliner underneath your top eyelashes, not above them. That area is called the waterline and because it tends to be naturally wet, you will need to really work the pigment into the skin. See how it makes the model’s eyelashes look really dense and full in the after shot? It's like fake eyelashes... without the fake eyelashes.

12 Tips on Staying Inspired

Do you ever feel like you need a little extra bump in your business or just in your daily life? Here are 12 tips to keep you on your toes and feeling ready to tackle everything from a sink full of dishes to your long term business goals! These tips have helped me along with keeping my WHY where I can see it! I am thrilled and honored to help women change their lives and accomplish incredible things! Hop on over to my 100% online business to see how and why!


Saturday, December 28, 2013

FREE SAMPLE: Dolce & Gabbana


Just let them know where to send it and a free sample's all yours!

Quick Tip: Blowdrying Your Hair


DIY: Fuller Lips in Minutes!


Here’s what you’ll need:
A light nude makeup pencil (typically a multi-purpose pencil or a concealer pencil)
A nude/blush lip pencil just a hair darker than your natural lip color
A  nude gloss

Now, the general rule is that anything highlighted comes forward, and anything shadowed will recede. Using a combination of both, I’m going to show you a technique for making the center of your lips look bigger and more pronounced, giving your lips a “pouty” appearance.


Step-by-Step Directions:
  • Take your light nude mineral pigment such as Vulnerable by Younique and a liner brush such as Younique's cruelty free liner/shader brush, mix with a little Rosewater to make a creamy lip color, begin applying to just the center of your lips. Keep this color between your cupid’s bow; if you put your index finger right at the center of your lips, that’s about as much area as you want to cover.Be sure to extend this light nude pencil to the edge of your cupid’s bow as well as the lowest part of your bottom lip. Be careful not to draw outside of your actual lip line.
  • Take your darker pigment such as Irresistible, mix as directed above, and just outline and fill in your lips at the outer corners, blending inward just slightly.
  • Using your finger, lightly blend out the edges of the lighter color to eliminate any harsh lines.
  • Finish off by applying a nude gloss. The more sheer the better so that the highlight and contour come through! Try using Luxe by Younique

Tuesday, December 24, 2013

DIY: Natural Makeup Remover


Rose water can bring benefits to all skin types, it can help sooth and cool sensitive and irritated skin, balance and cleanse oily skin, rejuvenate, soften and tone mature skin, revitalize and add beautiful glow to the normal skin. Rose water is filled with anti-oxidants and various vitamins, therefore, it can help prevent the signs of ageing and nourish the skin. It also makes a killer makeup remover!

What you'll need:
  • 3 table spoons of rose water (I recommend Younique's Rose Water )
  • 1 teaspoon of coconut oil
  • 1 cotton pad
  • small bowl
Directions
Scoop out a teaspoon of coconut oil and drop it in your bowl. Pour 3 tablespoons of rose water. Mix it up as best as you can. You'll find it a bit difficult since the coconut oil is still solidified, so pop it in the microwave for 5 seconds and mix it once more. Take your cotton pad, soak it in the liquid and gently wipe off your makeup. It efficiently removes makeup not only from your face, but also, can be used on the gentle skin around the eyes. Never rub harshly nor stretch your skin while removing makeup! If there is any left over, I like to massage it on my hands, arms and legs! It leaves a healthy shine without being too greasy...not to mention the beautiful scent!

Monday, December 23, 2013

Beauty on a Budget: Free Sample of Katy Perry's, Killer Queen


Grab a free sample of Katy Perry's newest fragrance, Killer Queen! Just head over to the Facebook page, click "like" and fill in your info!

New Year's Eve: Gold Eyeliner


This encompasses two of my favorite things in a look - simple and gorgeous! This is the PERFECT sleek look that will shimmer beautifully when the ball drops on New Year's Eve!

Prevent Your Eyeliner From Running


Say goodbye to raccoon eyes! These two easy tips are fool-proof ways to keep your liner in line all day!

1. Makeup primer. If you don't use it already, you need to. One of primer's MANY benefits is it keeps your makeup in place all day long. Many forget to apply it to your lower lid as well, which is essential to preventing those nasty smudges. I use Younique's Moodstuck Primer. It's gluten-free, 100% natural, free of parabens, oils, synthetic fragrances, and cheap fillers so a little goes a long way.

2. Pressed Powder
You'll need:
  • A tightly packed concealer brush for perfect precision
  • Pressed powder [use one that is a shade lighter than your skin tone so you get the bonus effect of highlighting the area to draw even more attention to your eyes]
Directions:

  1. Dip the brush into the powder to load up both sides.
  2. Place the brush in a vertical position directly and precisely below the liner, but adjacently touching it, then stamp and sweep it from one corner to the other. This will set it and keep it from traveling downward.
  3. With the same brush, this time without reloading it with powder, sweep back over the area to really blend it in.

Friday, December 20, 2013

Beauty Budget: FREE Sample of Ojon Deep Conditioner


Origins is giving out free samples of Ojon's Rare Blend Deep Conditioner! This deep conditioner contains two potent phases: The amber is a restorative blend of 7 rare oils including pure hair-repairing Ojon™ Oil plus African Shea, Brazilian Muru Muru, and Indian Kokum butters. And the ivory is a moisture-rich cream infused with deeply nourishing plant-derived conditioners.

Snag your sample!

Makeup Tricks to Make Your Eyes Look Bigger


There's nothing like having a big pair of beautiful sparkling eyes.  If you'd like to make your eyes look bigger, there are several ways to go about doing that, and not all of them involve makeup.

Prep: You always want to prep your eyes first! Even if you're going without eyeshadow, applying a primer will even out your skin tone and fill in any wrinkles, which detract from your gorgeous lookers. I use Younique's Glorious It's 100% natural, gluten-free, free of parabens, oils, synthetic fragrances, and cheap fillers so a little goes a long way. 

Eyeliner basics: Don't apply eyeliner all the way around your eyes. When you apply eyeliner on your lower lashes, do it just below the lash line, not inside the rim. Don't let the line come all the way to the inner corner of your eye.

Extension: Extend the eyeliner beyond the outer corners of your eyes. This line should move upwards a little as well, mimicking a very long eyelash. This technique will make your eyes appear wider.

White: Add white eyeshadow or eyeliner to the inner corner of your eyes. This technique helps to bring more light into your eyes and produces the effect of larger-looking eyes. Use soft white though; a harsh white will look theatrical.

Eyebrows:  In much the same way a picture frame affects the way the picture looks, your eyebrows affect the way your eyes look. The simple act of removing stray hairs can make your eyes more noticeable.

Eyelashes: You want to make your eyelashes longer. A good way to go about this is a eyelash curler. I, personally, am still deathly afraid of them and prefer to use Fiber Lashes. It's a two bottle mascara system that uses the natural fibers from tea to extend your lashes & add  great volume, while still looking natural.

Bags: You definitely want to get rid of dark circles and bags as the puffiness makes your eyes seem smaller. The easiest way for me to do this is to splash a little rose water around my eyes in the morning. Other good ways are applying slices of raw potato or chilled tea bags for 20 minutes. 

Enjoy your big, beautiful eyes!


Make Your Razor Last Longer!


Razors are expensive. Cut down on your costs by extending their shower-shelf life!

Alcohol: Just fill a cup about halfway with rubbing alcohol and place your razor inside, but just make sure that the rubbing alcohol that you are using is 70 percent or higher. The water content in 70 percent rubbing alcohol could make the blades rust faster rather than preventing it.

Baby Oil: When you are done using your razor, shake off any remaining water and apply a little bit of baby oil to the blades. This will keep the blades moisturized while also preventing the blades from rusting. When you go to use your razor the next time, it will be silky smooth.

Jean Trick: Running the blades over a pair of old blue jeans a few times keeps the blades sharp and will prevent nicks and cuts next time you use the razor. Just gently swipe the razor over a pair of old jeans one way and then a few times the opposite direction. The first time I tried this trick, I was amazed at how much longer my razor did last.

100% Gluten-Free Lip Gloss!


  • 100% Gluten-Free
  • Long lasting mineral formula nurtures and softens lips
  • 10 great hues - from bold to natural - to choose from! 
  • Only $15 each from Younique

Other gluten-free, mineral makeup you need in your life: Makeup Must-Haves

Quick Tip: Nail Polish Remover


Thursday, December 19, 2013

Before Bedtime Beauty Tips


Taking care of yourself is a full-time job -- and that doesn't stop when you go to bed! Follow these tips before you hit the sack for some true beauty sleep.

Clean: No matter how tired you are, you NEED to remove ALL of your makeup at night. (Don't forget the eyebrows too!) Leaving your makeup on overnight = rolling out the red carpet for acne & other skin irritations.

Moisture: Running a dehumidifier at night adds an instant touch of skin-plumping moisture with little to no work on your behalf.

Eye Cream: Even if you're in your 20's you need to start using eye cream now! (Why? The skin around the eye produces very little oil, and once you hit puberty, the glands stop producing that oil. Hydration is a must! The skin around your eyes is much thinner and more delicate than other areas, so it’s more prone to damage and will start showing signs of aging sooner.) I actually use Younique's Brilliant Moisturizer. It's gluten-free & is made from pearls, natural silver + ginseng. HEAVEN.

Silk: Splurge a little and buy silk pillowcases. Standard pillowcases actually tear and damage your hairs but the fibers in silk reduce friction so it does very little damange. It also prevents wrinkles and creases on your face!

Elevation: Sleeping with two pillows can help you look ravishing in the morning too. This helps with the flow of lymph and blood, which leaves you looking and feeling rejuvenated in the morning.

Ponytails? A lot of credible beauty experts will tell you to sleep with a ponytail at night so you can wake up with extra  volume. No. Don't do this. The band will cause breakage and the tension leaves you vulnerable for headaches in the AM. Do: sleep with a loose braid (sans an elastic band) so you can wake up with pretty waves. 

And don't forget the basics: drink water, strive for 8 hours of sleep a night & de-stress: 10 minutes of meditation before bed can do wonders!


FREE Stuff: Grab an OPI Nail Lacquer!


Happy holidays! JCPenney is currently GIVING AWAY touch ups (hair) & mini OPI nail lacquers! All you need to do is stop by their xpress bar!

Beauty 101: Makeup Primer Basics

Primer is the ultimate makeup multi-tasker: it helps prevent oil production, fills in fine lines& wrinkles, provides an extra layer for the pigment in the rest of your face makeup to adhere to, and acts as an invisible buffer between your skin and the elements. Not only will the color of your makeup be more vibrant, but it will also last longer throughout the day. 

I use Younique's Glorious -- it's gluten-free,100% natural, free of parabens, oils, synthetic fragrances, and cheap fillers so a little goes a long way.


You may also like: Benefits of Makeup Primer

Tuesday, December 17, 2013

Quick Beauty Tip: Detox Bath


DIY: Homemade Vanilla Honey Bubble Bath


This is SUCH a luxurious DIY bubble bath! Honey is a natural humectant that promotes moisture retention.Almond oil is PACKED with vitamins that promotes revitalization. (It also reduces redness & inflammation so it's good for skin issues like acne, psoriasis and eczema.) Egg whites draw oil from your pores & tighten your skin, leaving it healthy and glowing.


Ingredients:
½ cup almond oil
1 egg white
1 tablespoons vanilla extract
½ cup unscented hand/body soap
¼ cup honey

Directions:
Just mix the ingredients and you will have a wonderful bath experience :)

Quick Beauty Tip: Nails


Beauty How-To: Perfect Natural Smoky Eye


I am ABSOLUTELY in love with this look! It (somehow) has the perfect combination of natural, dramatic & smoky. It's also super easy to pull off!

Inner corner: Younique Sexy
Upper lid: Younique Feisty
Outer corner: Younique Devious
Bottom lid: You also want to line the inner corner with Sexy, then a line of Feisty all the way to your outer corner & overlap the Sexy with Devious. 

The secret - as always - is blending! Quality brushes are a necessity to any fabulous look. (I use this eye brush set. They use quality fibers, are angled perfectly for blending & have lasted forever.) 

DIY: Make Your Own Hairspray


Ingredients:
1/2 cup water
2 teaspoons sugar
2 Tablespoons rubbing alcohol
Spray bottle
6-8 drops essential oils (optional)

Directions:
Heat water to a boil and turn off heat source. Add 2 tsps of sugar and stir until completely dissolved. Then add 2 tablespoons rubbing alcohol and 6-8 drops of your favorite essential oil scent (optional).[I actually skip the oil & use rose water  since it smells great AND is great for your hair.]

Monday, December 16, 2013

DIY: Whiten Your Teeth


I'll admit it. I'm ADDICTED to coffee. I always try and make sure to brush my teeth after drinking my morning cups... yes, CUPS, but still need an extra boost to keep my smile bright white. I tried every whitening strip on the market but my teeth are WAY too sensitive and leave me in mega pain. 

This simple and safe solution has been my life saver!


Peroxide + Baking Soda: Using a small mouthwash cup, mix some Hydrogen Peroxide (3% for Oral Use) and baking soda into a fine paste and apply a little of this paste on top of your toothpaste while brushing. That's it!


Travel Beauty Tips


It IS possible to step off the plane after a long flight looking like a million bucks! Here are a few refreshing tips:

Hydration: Plane cabin air (or blasting the AC/heat in the car) sucks the moisture out of your skin and hair. Before you leave spray some leave-in your conditioner in your hair & use a soft scarf to wrap your do. This will keep your style looking fresh when you take it off at the end of your journey AND lock the moisture in for a deep cleanse while traveling. Make sure to pack your favorite skin moisturizer and apply every hour.

Dry Shampoo: A necessity for any long trip to get rid of those oily roots. I recommend taking a homemade dry mixture as opposed to the aerosol cans you buy in stores -- making more room for your liquid necessities.

Minimal Makeup: You do NOT need to carry your entire makeup arsenal. A few touch ups will do just fine. The most important touch up = blush. Blush instantly gives your dull, tired face a splash of color and a more youthful appearance.

Rose water: Seriously -- the travel savior! Splash under your eyes to instantly remove bags & dark circles. It also hydrates your skin, tones it and smells great. Younique has a great travel-ready rose water.

Basics: Grab a brush, a little perfume, a mini-deodorant and you'll be ready to take on the town when you get to your destination!


DIY: Dry Shampoo


Ingredients: 

2 Tablespoons Cornstarch
2 Tablespoons Baking Soda
2 Tablespoons Cornmeal
2 Tablespoons Ground Oatmeal
A salt shaker type container to store dry shampoo

Directions: 
  • Grind up oatmeal in a blender. You want it to be fine enough to be able to go through a salt shaker, so give it some time in the blender.
  • Measure out 2 tablespoons each of: cornstarch, cornmeal, baking soda and the ground up oatmeal. Mix it all together in a bowl and you’ve got yourself some dry shampoo. Store in your favorite container.
  • To use: sprinkle on, massage into your scalp & use a bristle brush to remove any excess!

Thursday, December 12, 2013

Get Rid of Cold Sores Fast!


I get it. No one really likes to discuss it but the occasional cold sore can happen, and when it does it can completely ruin a day... or week. This natural tried & true method produces immediate results for relief & can also prevent those pesky jerks from even showing up.

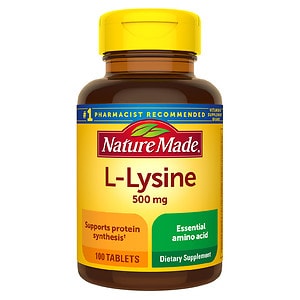
Lysine: Lysine is a natural amino acid sold for $5 alongside vitamins and supplements. (It suppresses an opposing amino acid that increases viral growth.) You can take it at first symptom to GREATLY reduce the severity of the cold sore or even prevent it entirely. Some people even take lysine daily to inhibit them completely.

Lemon balm: Find a lip product containing lemon balm! Many people swear by Herpecin L -- also $5, and it also contains Lysine & SPF 30! Studies show lemon balm reduces swelling and redness. Again, use it at first sign and then about once every hour. 


With this winning combination you can forever say goodbye to awkward cover up attempts and hiding that gorgeous face of yours!

PRO TIP: Using Concealer to Hide Dark Bags


Feel like your concealer is highlighting those pesky dark eye bags instead of hiding them? Here's a pro technique to help!

I highly recommend using a concealer brush The fibers are tapered and tightly packed so it perfectly fits the contours of eyes and blemishes for ideal coverage.

Blend in a little orange pigment to your concealer. With your concealer brush, swipe the color-correcting concealer under your eye in a "V" shape from your outer to inner corner. Then, buff the concealer into your skin, until you get to the center of your lower lid, where you'll want to feather the concealer for a lighter application.

It's really that easy! 

I personally prefer mineral powdered concealer since it doesn't clog my pores and GREATLY reduces oil & shine. 

Beauty Tutorial: Galaxy-Inspired Eye!


This space-inspired look is OUT OF THIS WORLD. (<--- Why I'm not a professional comedian.)

Seriously though, this eye is beyond gorgeous & can be EASILY achieved with the following hues from Younique(100% natural, chemical-free, mineral-based pigment powders, free of talc, oils, preservatives, perfumes, synthetic dyes, and parabens.)

Awestruck: Use this rich, shimmering blue on the base of your eyes.

Regal: Apply this deep purple in the crease of your eyelid, hitting both the inner & outer corners. You'll also want to line the bottom eyelid. 

Devious: Hit both the inner & outer crease with this gorgeous black. You can also wet your brush and use it as eyeliner (make sure to line the bottom eyelid as well). You want the eyeliner to be bold to get the deep space look. GO BOLDLY WHERE YOU'VE NEVER GONE BEFORE. (Okay.... I'll stop. I'm sorry.) 

The secret to perfecting this look is blending, blending and more blending. You want to create the beautiful starscape where the colors run into each other softly. 

(Quality brushes are essential for beautiful blending.)


How To: Make Your Perfume Last ALL DAY!


Before you leave in the morning, you spritz yourself with your signature scent. But no matter how much you spray (cough), that scent fades throughout the day. 

Roll-on fragrances are the answer to all of your unscented woes: They're small enough to shove in any bag and easy enough to apply in the most public of places. Plus, they last seemingly forever and are way cheaper than buying the whole bottle.

Sephora has a large collection to choose from: http://bit.ly/16gdfCf

OR buy an empty rollerball bottle for a couple of bucks and fill it yourself: http://amzn.to/15N8roa

Wednesday, December 11, 2013

Makeup MUST HAVES!


This mineral makeup kit is overflowing with MUST HAVE products from Youniqe: a company that's dedicated to high-quality, all natural make up that is GOOD & BENEFICIAL for your skin. 
Grouped together in this beautiful black case:


Magnify and enhance your OWN lashes!
3D Fiber Lashes: Packaged in two separate bottles, the Transplanting Gel and Natural Fibers are used together to enhance and magnify your OWN lashes. This uses the 100% natural fibers taken from the campanulaceae of green tea and gives you a 300x increase in thickness and volume. Fake lashes are so 2012! (Gluten-free)

Are you 'moodstruck' yet?


Four (4) Mineral Pigments: 100% natural, mineral-based pigment powders consisting of finely crushed minerals that bond to the skin offering long-lasting, sweat-proof coverage. High-quality pigments that do not contain talc or other unnecessary filler ingredients. (Gluten-free)
put caption here


All-in-one moisturizer, treatment, and foundation as a single-step cream to immediately balance the skin, correct its complexion, and protect its youthful appearance. Comes in 3 shades for any skin tone. (Gluten-free, vegan)


Brilliant Moisturizing Gel: Made with Pearl Powder, Brilliant Moisturizing Gel is a rich and restorative facial moisturizer that is formulated to leave the skin hydrated, energized, and healthy. (Gluten-free)
put caption here


Lucrative Lip Gloss: A rich spread of color, very smooth and highly-pigmented -- bright, bold, or subtle. 10 awesome shades to choose from. (Gluten-free)


Glorious (glo-ri-ous) (adjective):  brilliantly beautiful or magnificent
Primer: Primer has a ridiculous amount of benefits (which you can learn about here). Creating a smooth surface & making your makeup last all day, this mineral primer is 
100% natural, free of parabens, oils, synthetic fragrances, and cheap fillers. (Gluten-free)


Awake Facial Cleanser: Awake contains a range of beneficial ingredients that awaken and cleanse the skin. Its thick texture transforms into an effective lather to dissolve oil and makeup, rinsing away pore-clogging surface debris, impurities, and excess oil. It refines the skin texture, brightens skin clarity, and minimizes the look of pores over time. (Gluten-free)


Grab a kit today! Orders made by December 15th are guaranteed to be delivered before Christmas!


Tuesday, December 10, 2013

Everything You Need to Know About Blush

One of the biggest beauty blunders made is blush gone wrong. It's meant to be a natural and subtle looking makeup. Too much and we're looking like Bozo the Clown; too little and you'll just look dull. Lucky for us, there's a few SIMPLE tips to nail the perfect look.


The Right Shade: SO simple! When picking a cheek color, you want to use a color as close as possible to that of your lips or your natural blush color.

The Right Tool: Make sure to have a high-quality blush brush on hand. The angled bristles makes it easy to contour the face or to sculpt the cheekbones with great precision and little effort and also the bristles are firm enough to pick up the right amount of product, but also soft enough to feel comfortable on the skin. (Younique's brushes are amazing! They have an inner high-quality copper ferrule so they'll never rust, are made to last a lifetime, and are cruelty-free.)

Application: Place a small amount of blush onto the brush and tap off any excess. For the most natural look, begin your blush application at the top of the apple of your cheek. The idea is to deposit most of the pigment where rosiness would first appear naturally, if you were simply flushing. If you can’t see where that spot is, smile to push the apples up. Then, placing the color on the part that lies directly below your pupil, blend outward, toward the ear.


Monday, December 9, 2013

Makeup for Photographs


1. Use matte colors - Shine is the enemy of photography. Dewy skin is attractive in real life, but in photos it will look like an oil slick. Matte makeup won't reflect light, making it easy to apply and easy to photograph.

2. Use powder - Even if your makeup is applied perfectly, if you look shiny in your pictures it can ruin your whole look. Along the lines of Tip #1, using a finishing powder will make your face more matte.

3. Fill in your brows - Even if you don't fill in your brows on a daily basis, fill them in for your pictures. Your eyes and face will look so much more complete if your brows are looking polished. This especially goes for blondes. Blonde eyebrows will disappear in photographs.

4. Boldly go where you don't usually - Makeup photographs two shades lighter in pictures. Do your blush, eyes and lip color a little more vibrant than you normally would.

5. Lashes, lashes & more lashes! - A lot of professional photographers recommend wearing false lashes. I personally can NOT stand fake lashes. (It may or may not have to do with a fear of gluing my eyes shut.) I use and love 3D Fiber Lashes. It's a 2 bottle mascara system that uses natural fibers taken from the campanulaceae of green tea and it's beyond AMAZING.

6. Apply your makeup in natural light - When you put on your makeup, sit by a window or in a room with a lot of natural light. This will give you the best idea of what your makeup really looks like, and how it will look in the pictures.

7. Wax - makeup does not adhere well to peach fuzz. Whatever you normally wax on your face, wax it before your pictures. I suggest waxing at least 48 hours before your pictures to give enough time for any redness and swelling to go down.


The most important tip is to HAVE FUN! Happiness shines out of your eyes and will always improve your pictures a million times over!

DIY: Cinnamon Face Mask for Acne!


The honey in the mask is a natural humectant, giving skin the moisture it needs. Cinnamon gently exfoliates your skin, and nutmeg acts as a natural anti-inflammatory, which can help reduce redness and swelling. The mask soothes the skin and helps prevent infection.

You'll need:
1 tsp. cinnamon
1 tsp. nutmeg
2 tsp. honey

Directions:
Mix all ingredients together in a small bowl. (The mask will be a thick paste.) Apply the mask to your face with your fingertips and let sit for 15 minutes. Wash the mask off with warm water, gently rubbing in a circular motion to exfoliate.